Form of Threat Intelligence
I’ve come across some interesting terms that I’d like to share with you. One of these terms is Tactical TI, which encompasses two important concepts: “Indicators” and “Observables.” These terms play a crucial role in identifying potential threats. Indicators are like clues that provide hints about the presence or activity of a threat, such as IP addresses or file hashes. Observables, on the other hand, go beyond indicators and include a wider range of elements that can be observed or measured, like behaviors and characteristics.
Moving on to Operational TI, I’ve discovered that it offers a deeper level of understanding by providing richer contextual information. This means going beyond the surface-level indicators and delving into the tools, techniques, and procedures (TTPs) employed by threat actors. TTPs represent the methods and strategies used in cyber attacks. By analyzing TTPs, we gain valuable insights into how threats operate and can enhance our defenses accordingly.
Another intriguing aspect of threat intelligence is Strategic TI. This form of intelligence focuses on summarizing actor motivations, intentions, and capabilities. It helps us see the bigger picture and make informed decisions regarding our security measures. By understanding what drives threat actors and their capabilities, we can proactively safeguard our digital assets and minimize potential risks.
In the world of threat intelligence, collaboration and information sharing are vital. To facilitate this, there are open standard formats available, such as STIX and MISP. STIX, which stands for Structured Threat Information expression, provides a common language for representing and sharing structured threat information. On the other hand, MISP (Malware Information Sharing Platform) is a platform dedicated to collecting, storing, and sharing information about malware and other cyber threats. These open standards promote collaboration among cybersecurity professionals, allowing them to exchange valuable insights and stay ahead of the constantly evolving threat landscape.
As I continue my journey as a student in the realm of cybersecurity, I find it fascinating to explore the various aspects of threat intelligence. Understanding indicators, observables, TTPs, and strategic insights empowers me to take a proactive approach to cybersecurity. By leveraging open standard formats like STIX and MISP, I can contribute to the collaborative effort of securing our digital world
Threat Intelligence in Azure
- Data Connectors
- Workbooks
- Incidents
- Analytics
- Hunting
- Notebooks
- Investigations
Microsoft Sentinel with the Threat Intelligence Platforms data connector
Many organizations use threat intelligence platform (TIP) solutions to aggregate threat indicator feeds from various sources. From the aggregated feed, the data is curated to apply to security solutions such as network devices, EDR/XDR solutions, or SIEMs such as Microsoft Sentinel. The Threat Intelligence Upload Indicators API data connector allows you to use these solutions to import threat indicators into Microsoft Sentinel.
Bringing Threat Intelligence Platform to Azure Sentinel
Integrated Threat Intelligence Platforms
    MISP Threat Sharing
    Threat Connect
    MINEMELD
    ANOMALI
Custom applications via Microsoft Graph Security API
    Python
    C#
    Node JS
    Azure Logic App
(New) TAXII servers
    TAXII
TAXII data connector
Add threat indicators to Microsoft Sentinel with the Threat Intelligence
How to Configure Azure Sentinel?
Please do check my other Blog about Configuring Azure Sentinel – Deploying Microsoft Sentinel: A Comprehensive Guide
Prerequisites
Sign up for an Application ID and Client secret from your Azure Active Directory. Whether you are working with a TIP or with a custom solution, the tiIndicators API requires some basic information to allow you to connect your feed to it and send it threat indicators. The three pieces of information you need are:
- Application (client) ID
- Directory (tenant) ID
- Client secret
You can get this information from your Azure Active Directory through a process called App Registration which includes the following three steps:
- Register an app with Azure Active Directory
- Specify the permissions required by the app to connect to the Microsoft Graph tiIndicators API and send threat indicators
- Get consent from your organization to grant these permissions to this application.
Let’s Configure!
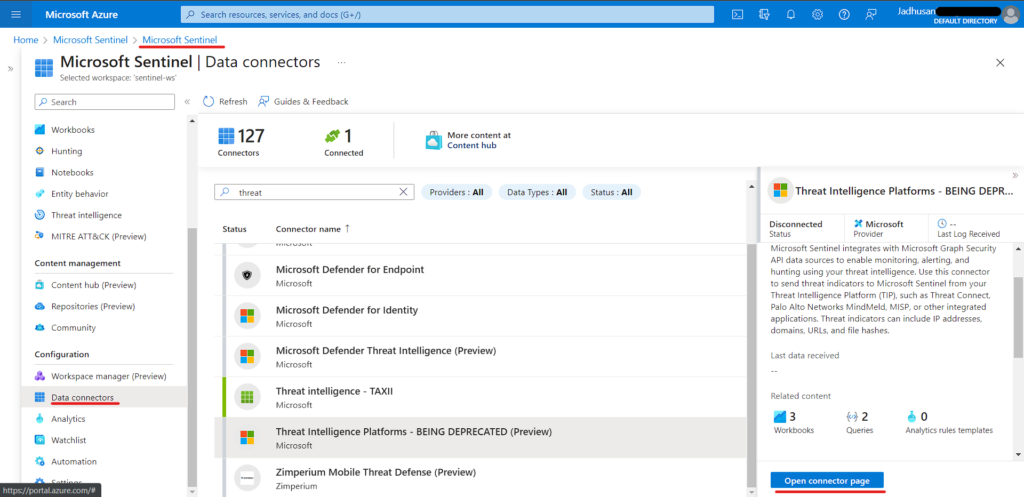
To configure Data Connectors Platform,
- Search for Microsoft Sentinel -> Workspace
- Click on Data Connectors
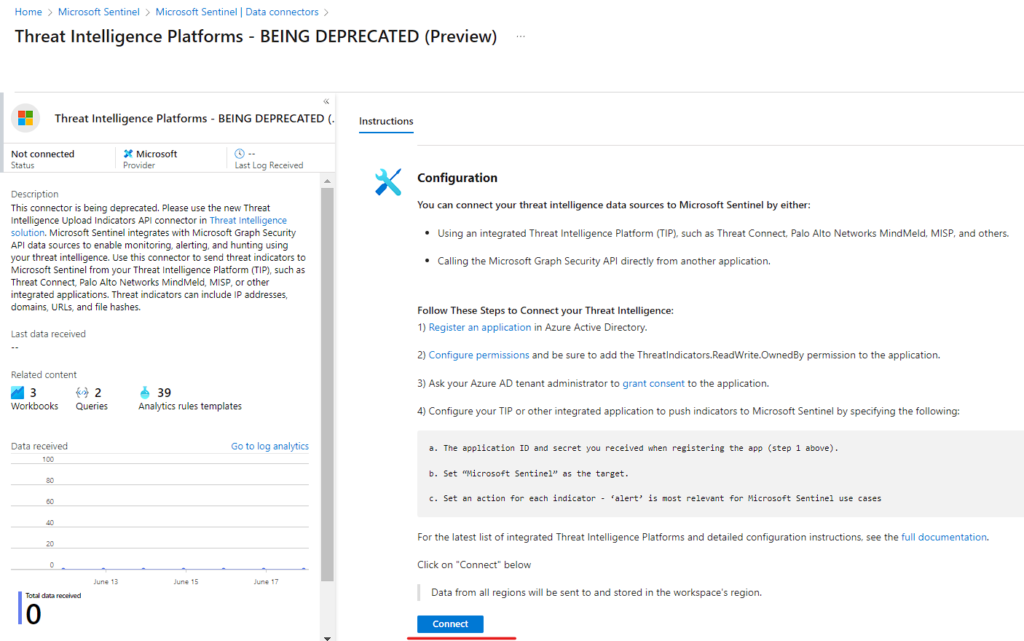
- Search for Threat and you will get the data connector platform
- Threat Intelligence Platforms
In Connector Page you can see the instruction. This Connector uses Microsoft Graph Security API.
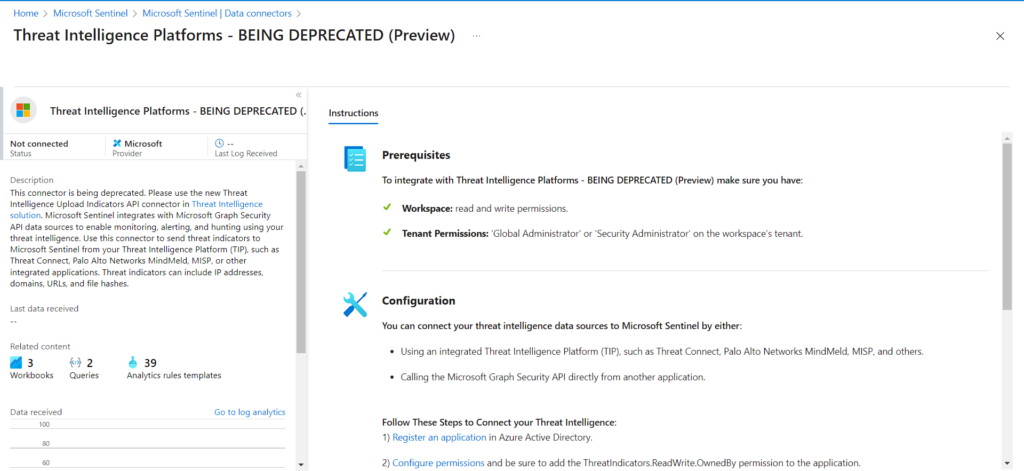
In order to interact with the Microsoft Graph API, which is a programming interface provided by Microsoft, you need to register an application that will act as a representative for this connection. This registration process involves creating an application ( in Azure Active Directory )and assigning it specific permissions or access levels.
Once the application is registered, the idea is to push indicators (such as threat indicators or security-related data) to Microsoft Sentinel. The information provided during the application registration process, such as the permissions granted to the application, will be used to establish the connection with Microsoft Sentinel. This connection allows the application to access and utilize the functionalities of Microsoft Sentinel for handling and analyzing the indicators or data being pushed.
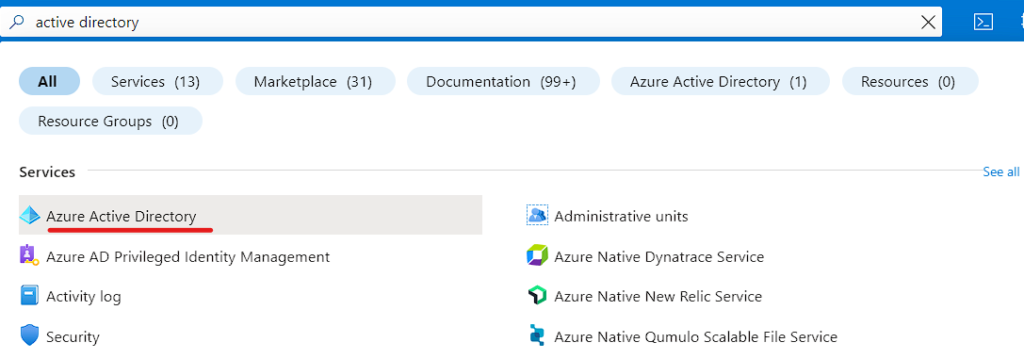
- Step 1 – Create Application in Azure Active Directory
Search for Azure Active Directory
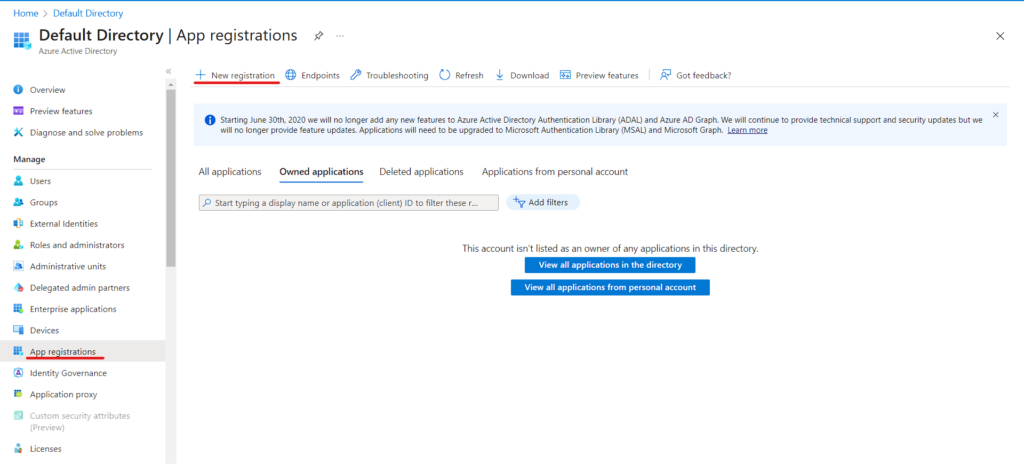
- Step 2 – Navigate to App Registration and click New Regisration
- Step 3 – Name the Application and select the Account type.
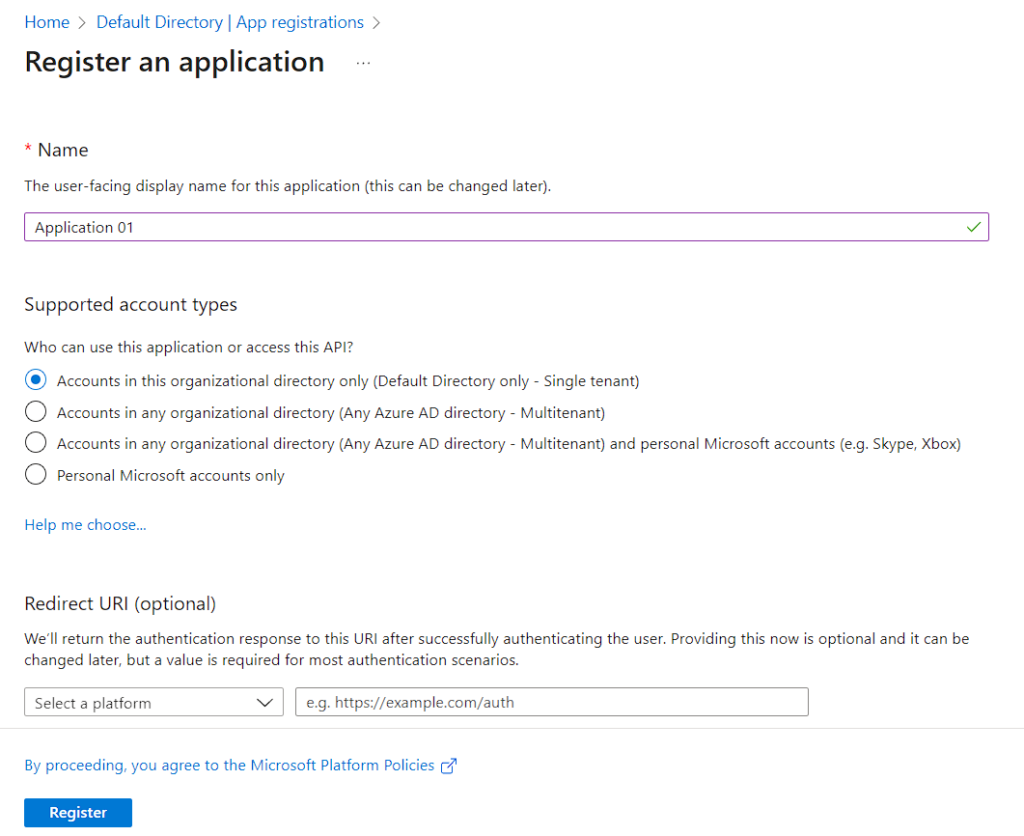
Understanding different account types
Accounts in this organizational directory only (Default Directory only - Single tenant)

All user and guest accounts in your directory can use your application or API.

Use this option if your target audience is internal to your organization.
Accounts in any organizational directory (Any Azure AD directory - Multitenant)
All users with a work or school account from Microsoft can use your application or API. This includes schools and businesses that use Office 365.
Use this option if your target audience is business or educational customers and to enable multitenancy.Accounts in any organizational directory (Any Azure AD directory - Multitenant) and personal Microsoft accounts (e.g. Skype, Xbox)
All users with a work or school, or personal Microsoft account can use your application or API. It includes schools and businesses that use Office 365 as well as personal accounts that are used to sign in to services like Xbox and Skype.
Use this option to target the widest set of Microsoft identities and to enable multitenancy.Personal Microsoft accounts only
Personal accounts that are used to sign in to services like Xbox and Skype.
Use this option to target the widest set of Microsoft identities.Reference : Accounts supported by an application
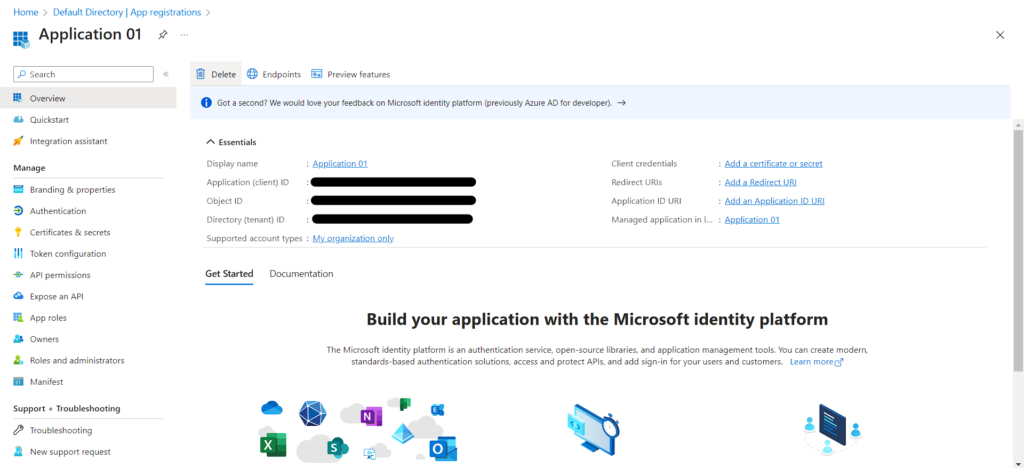
- You see the Application (client) ID. Also called the client ID, this value uniquely identifies your application in the Microsoft identity platform.
- Your application’s code, or more typically an authentication library used in your application, also uses the client ID. The ID is used as part of validating the security tokens it receives from the identity platform.
After Registering we have to give permission.
- APP Permission -> Add a Permission -> Microsoft Graph
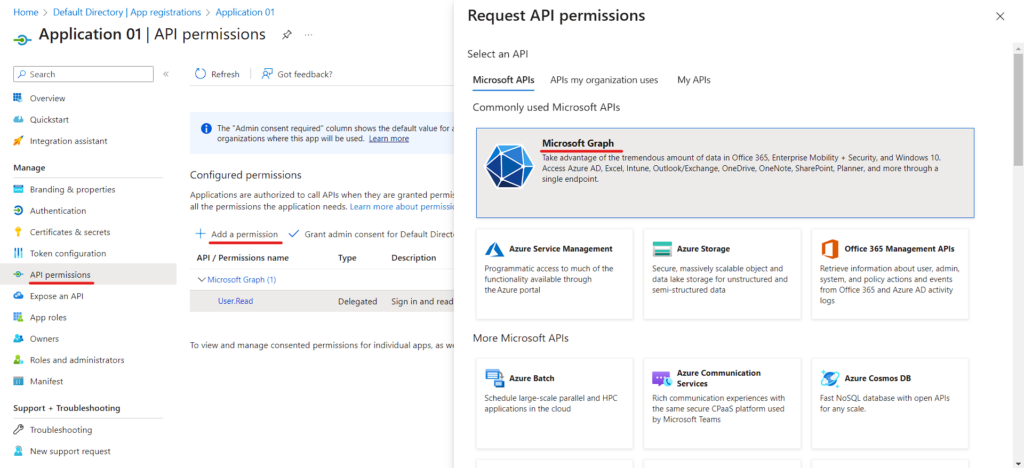
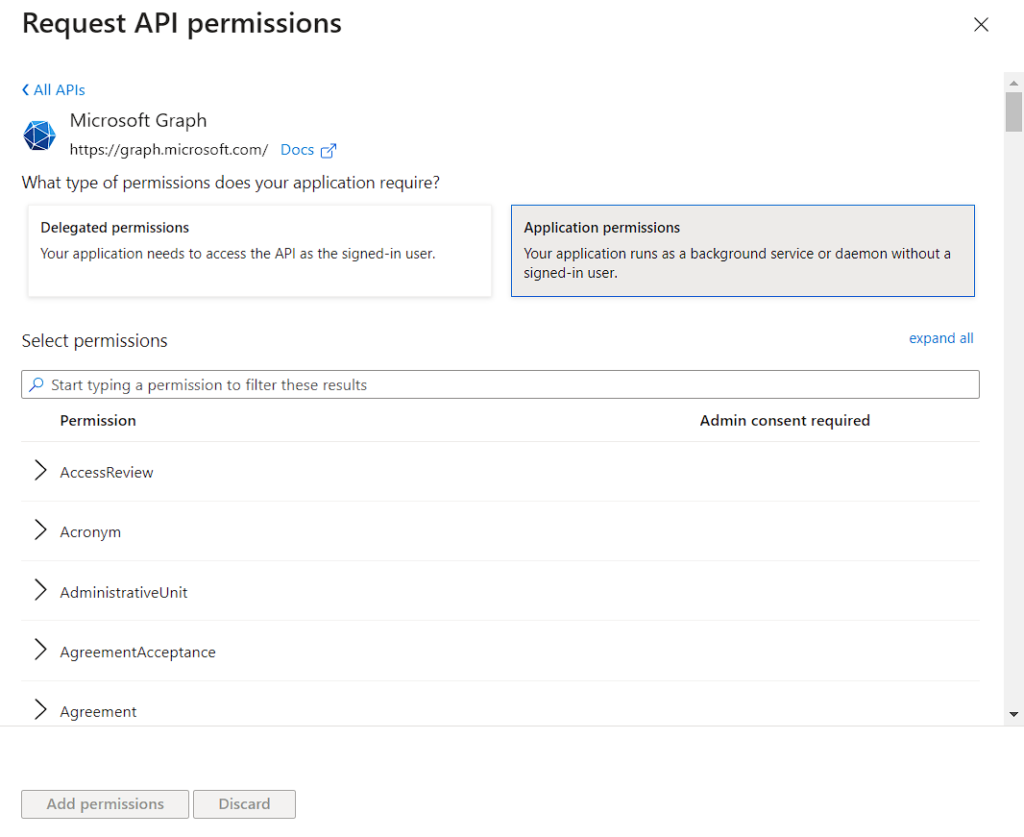
After Choosing Microsoft Graph, there will two option
- Delegated Permission – When you connect to API, you will be connecting as sign in user.
- Application Permission – Your application won’t connect as user but uses an app secret as password.
We will be using Application Permission
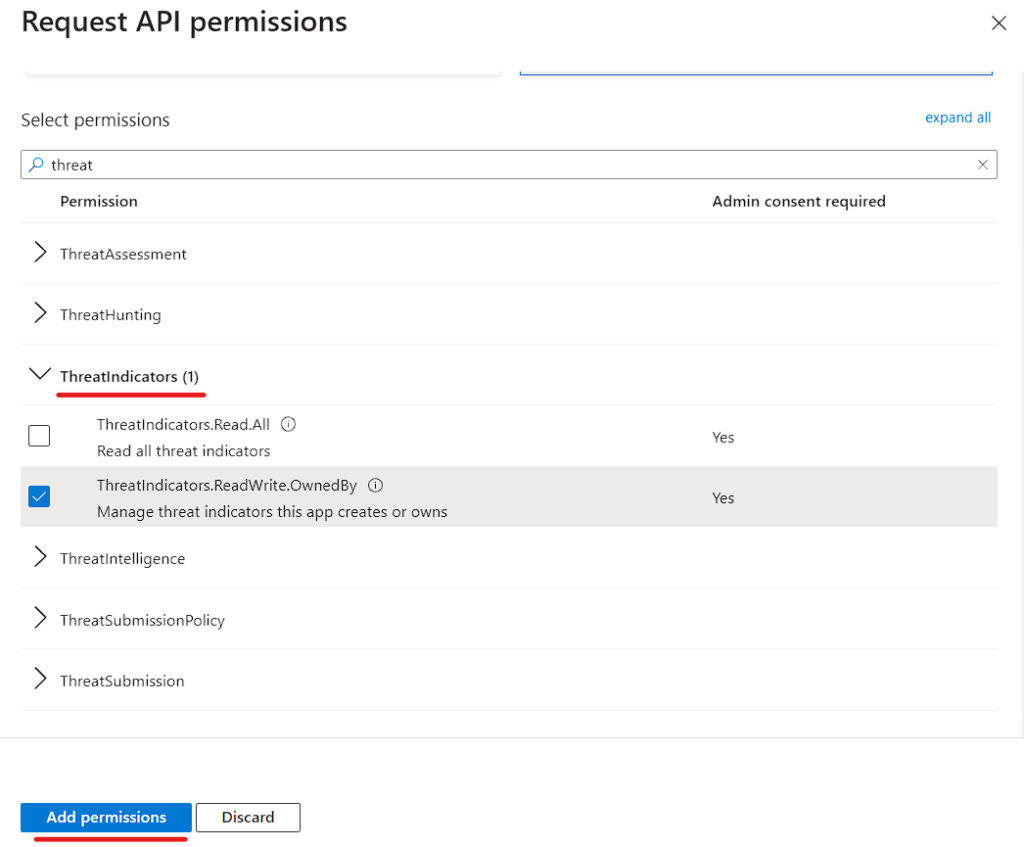
Search for “threat” and open up ThreatIndicators and give permission of Read and Write.
Click Add Permission
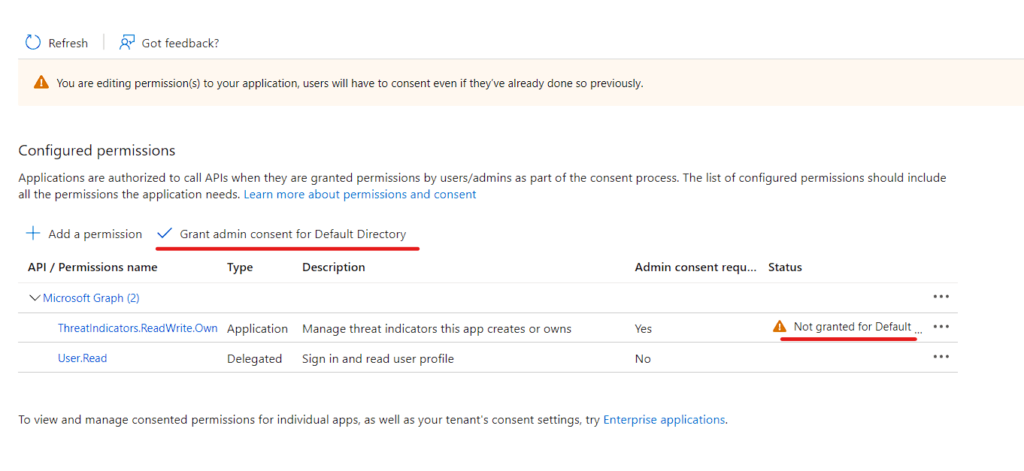
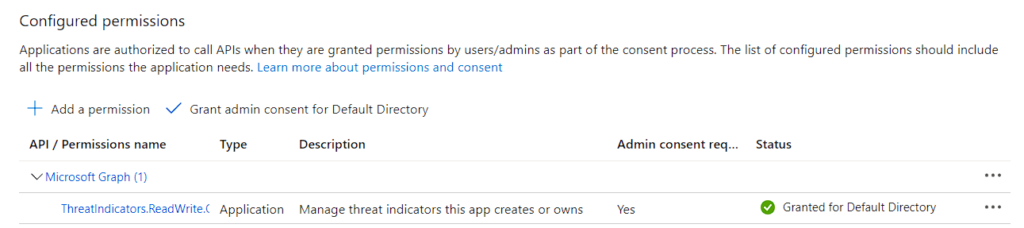
We need to Grant The Permission once its added.
Now let’s get the APP Secret
- Certificate & Secrets -> New Client Secret
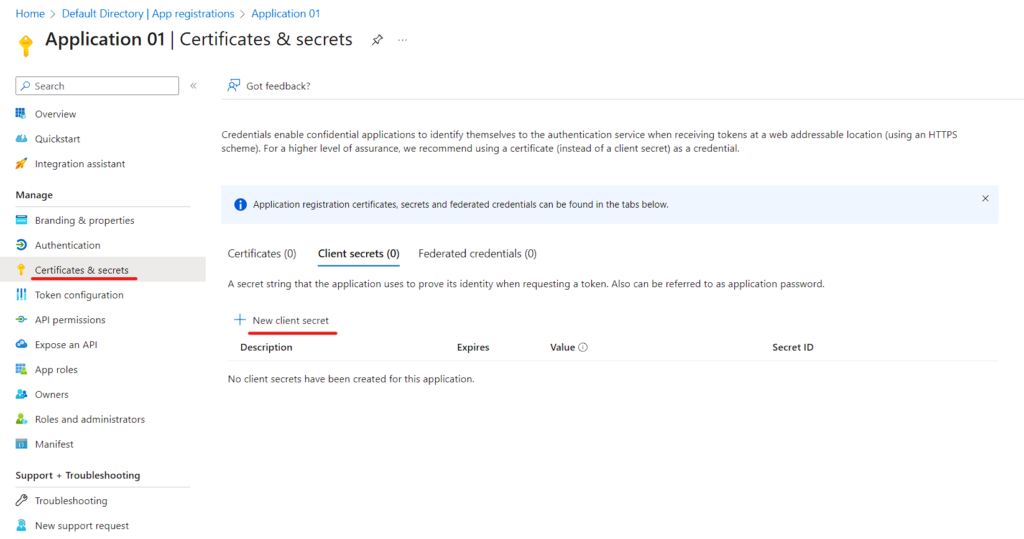
Write your Description and Click Add
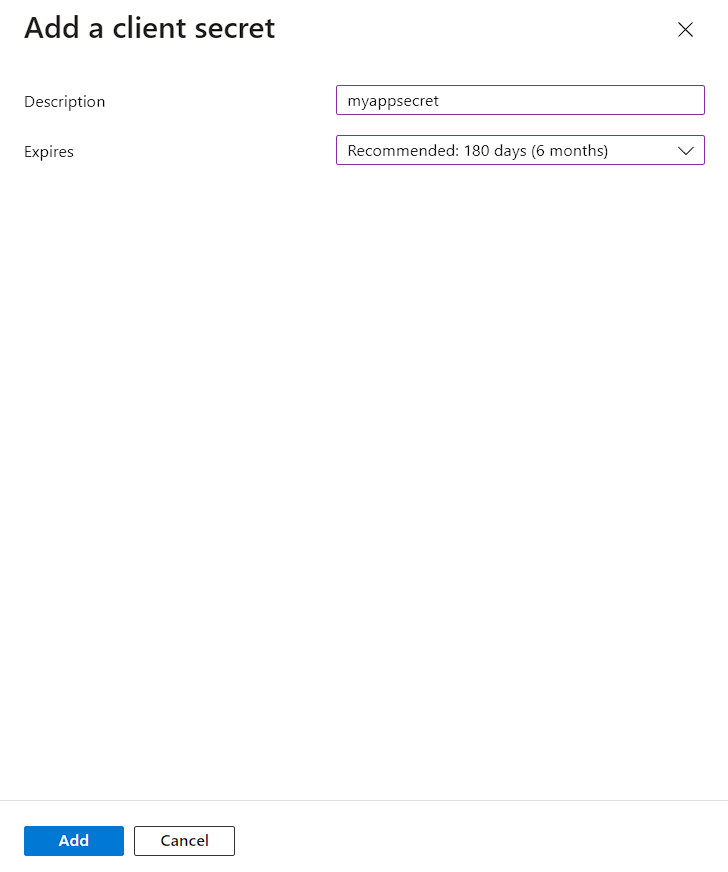
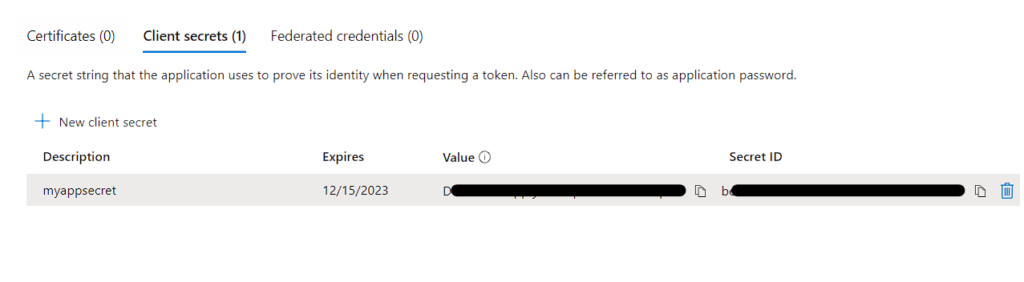
The Secret has been created and Make sure to note it down.
Overall information we need for Threat Intelligence to push data into Microsoft:
- Application ID
- Tenant ID
- Application Secret
These 3 information are, all of those platforms require when you’re establishing a connector to push threat intelligence to Microsoft.
- Now you can click on Connect
Utilize threat intelligence in Microsoft Azure Sentinel:
- Register an application: Create an application to represent your tip or customer application. This helps establish a connection and set permissions for interaction.
- Configure TIP integration: Set up your threat intelligence platform (TIP) to send threat indicators to Azure Sentinel. This ensures that relevant threat intelligence data is shared for analysis.
- Enable data connectors: Turn on the Threat Intelligence Platforms data connectors in Azure Sentinel. These connectors allow Azure Sentinel to receive and process the incoming threat intelligence data.
Please note that it might take a few minutes for the threat intelligence data to start streaming into Azure Sentinel. Once it begins, you can take advantage of threat intelligence to enhance your security monitoring and analysis.