Learn how to set up a secure and scalable network infrastructure in Azure using PowerShell commands. This step-by-step guide will walk you through creating virtual networks, virtual machines, subnets, firewalls, and route tables. Build a robust network architecture with ease.
Here’s a breakdown of the actions mentioned:
- Creating a resource group: This is a logical container for managing Azure resources.
- Creating a virtual network: It defines the network topology and IP address range for the virtual machines.
- Assigning IP addresses to the virtual network (VNET): This ensures that the VNET has a valid IP configuration.
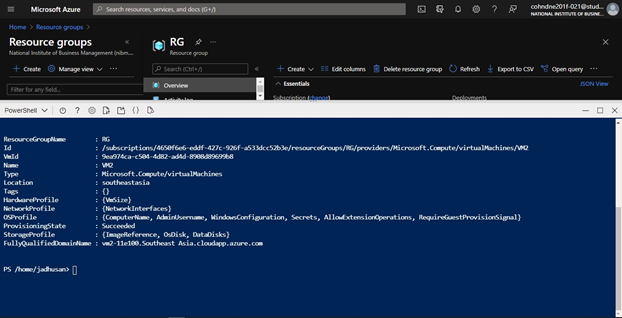
- Verification: Confirming the successful creation and configuration of the resources.
- Diagram of subnets: Displaying the layout of the subnets within the virtual network.
- Making virtual machines through PowerShell: Creating virtual machines with specific configurations using PowerShell commands.
- Virtual Machine 1 and Virtual Machine 2: The names and configurations of the created virtual machines.
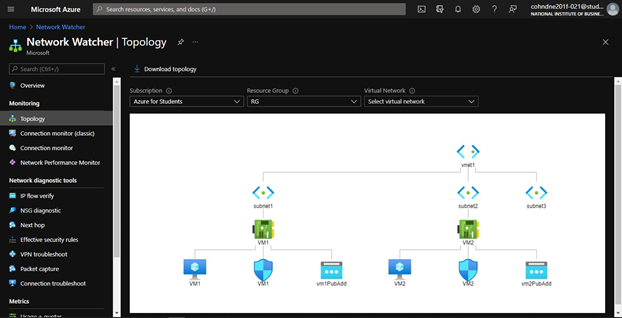
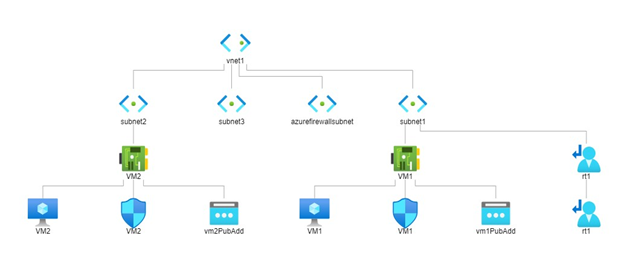
- Current topology view: Providing an overview of the network infrastructure.
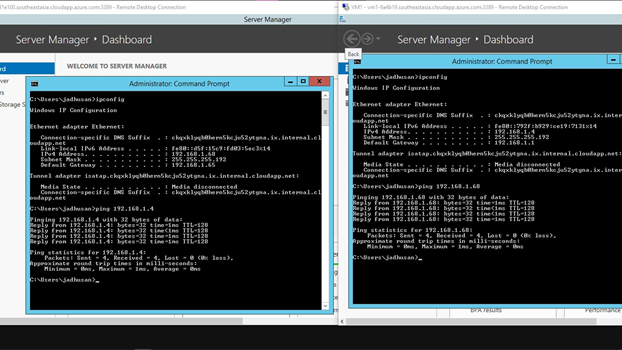
- Connection between subnets in virtual machines: Establishing connectivity between subnets within the virtual machines.
- Adding a firewall subnet: Configuring a subnet specifically for the firewall.
- Verification: Confirming the successful creation and configuration of the firewall.
- Creating a firewall: Setting up a firewall to control inbound and outbound traffic.
- Validation: Ensuring the firewall configuration is correct.
- Creating a route table: Defining the routing behavior for network traffic.
- Validation: Confirming the route table configuration.
- Verification: Ensuring the successful creation and configuration of the route table.
- Route table and subnets: Identifying the relationship between the route table and subnets.
- Adding a route: Configuring a specific route within the route table.
- Verifying IP address: Checking the assigned IP address after configuring the route.
- Diagram after firewall: Updating the network diagram to reflect the firewall configuration.
- Default traffic denial: Indicating that all traffic is denied by default.
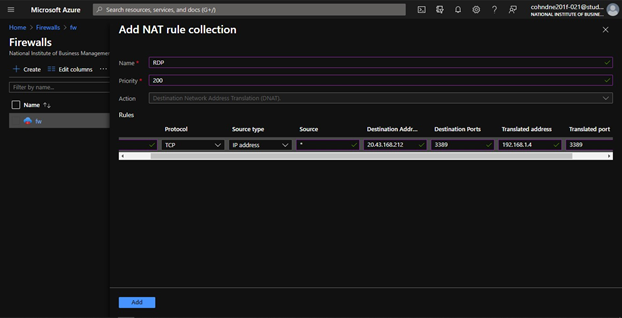
- Adding NAT (Network Address Translation) rule: Configuring a rule for network address translation, specifically for RDP (Remote Desktop Protocol) traffic.
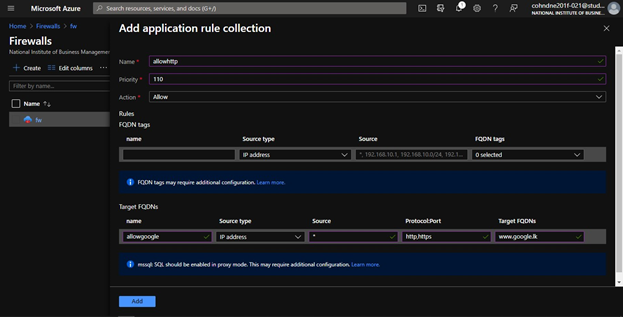
- Adding Layer 7 rule: Configuring a rule at the application layer to control traffic.
- Verifying: Confirming the successful addition of the NAT and Layer 7 rules.
Configuring the Lab
Create Resource Group by filling these:
- Name
- Region
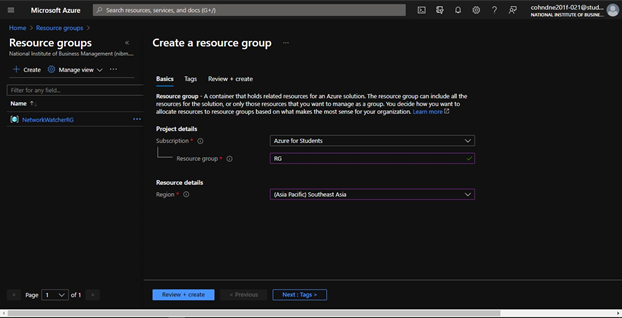
After Validation Pass, you can click create.

Create Virtual Network by filling these:
- Resource Group – We created Earlier
- VM Name and Region
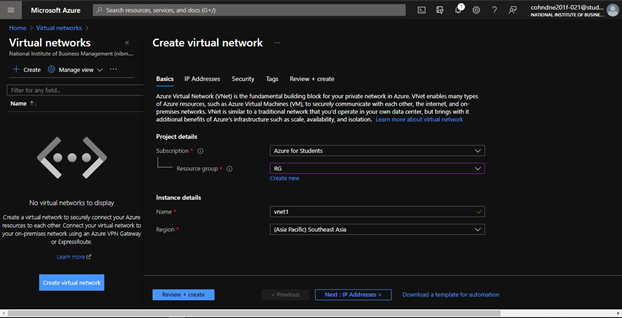
Assigning IP Addresses as follow:
192.168.1.0/24
192.168.10.0/24
And the Subnet as follow:
Subnet 1 - 192.168.1.0/24
Subnet 2 - 192.168.64.0/24
Subnet 2 - 192.168.10.0/24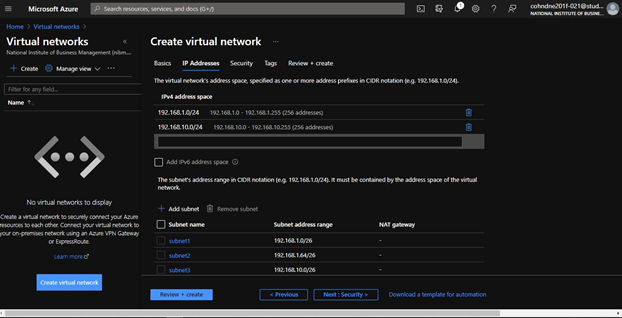
After Validation Pass, you can click create.
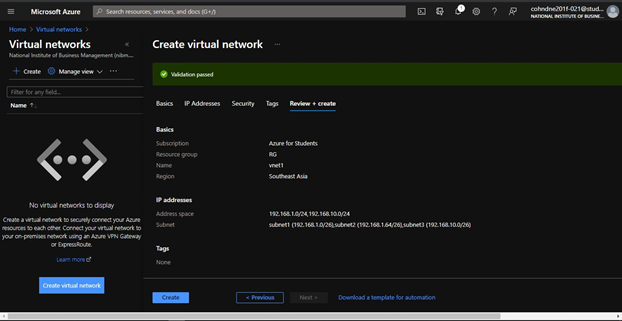
By clicking the Subnets you can verify the configuration.

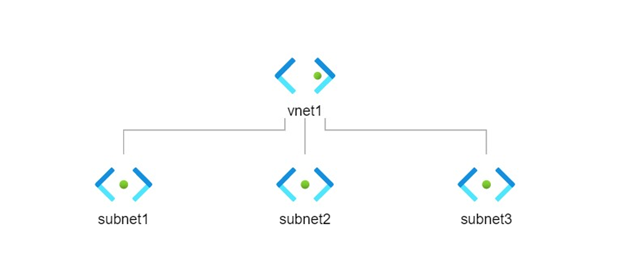
The Diagram of Subnets
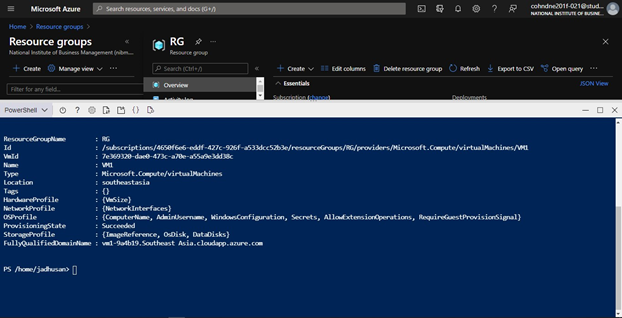
Creating Virtual Machine through Powershell:
New-AzVm `

-ResourceGroupName "RG" `

-Name "VM1" `

-Location "Southeast Asia" `

-VirtualNetworkName "vnet1" `

-SubnetName "subnet1" `

-PublicIpAddressName "vm1PubAdd" `

-OpenPorts 3389 `

-Image "Win2012R2Datacenter" `

-Size "Standard_DS1_v2"

New-AzVm `

-ResourceGroupName "RG" `

-Name "VM2" `

-Location "Southeast Asia" `

-VirtualNetworkName "vnet1" `

-SubnetName "subnet2" `

-PublicIpAddressName "vm2PubAdd" `

-OpenPorts 3389 `

-Image "Win2012R2Datacenter" `

-Size "Standard_DS1_v2"
Virtual Machine 1
Virtual Machine 2
The Topology of our Resource Group
Checking Connectivity between Subnet in Virtual Machine
We have to add the firewall subnet
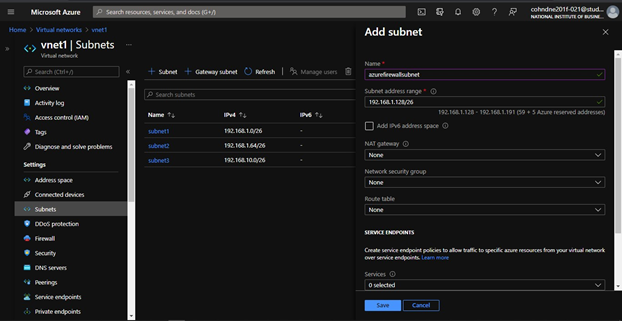
Click the Save and Verify the configuration

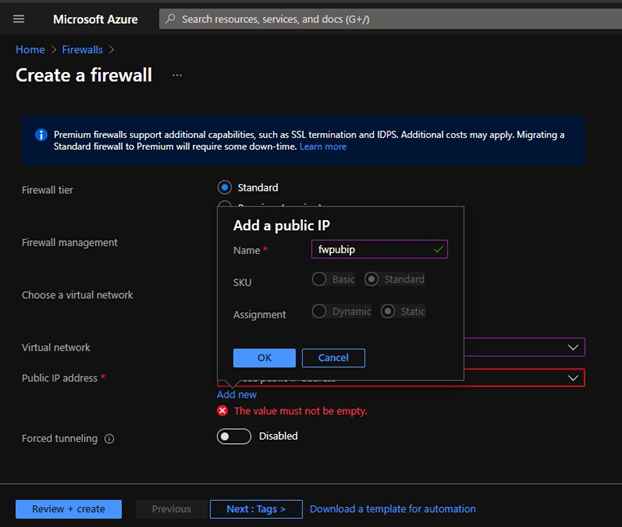
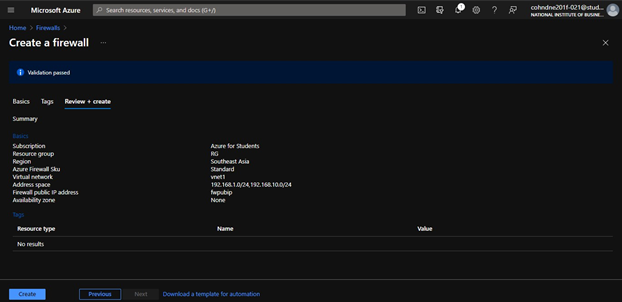
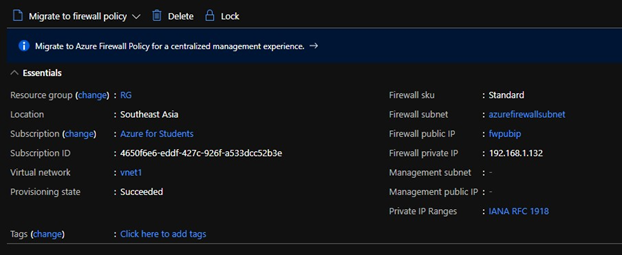
Now let’s create Firewall
Validation Passed
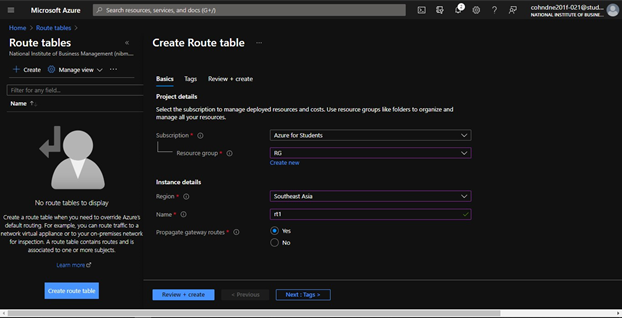
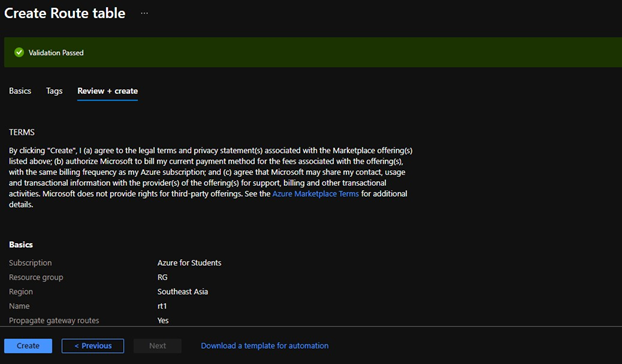
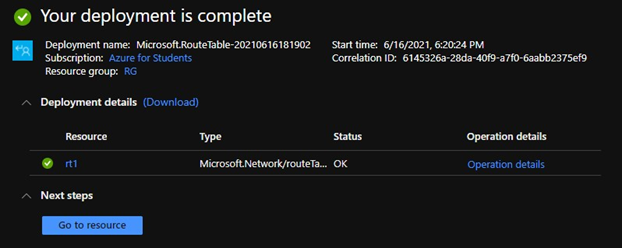
Now let’s create Route Table
Validation Passed
The deployment is completed
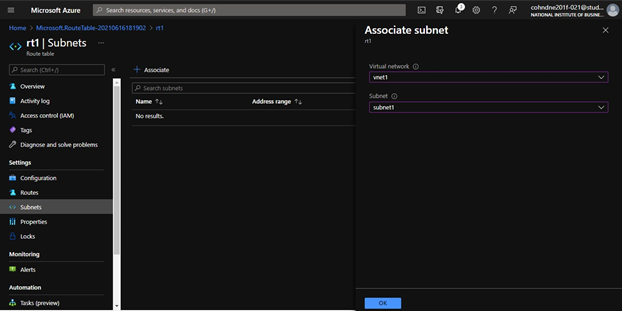
Route Table 1 Subnet
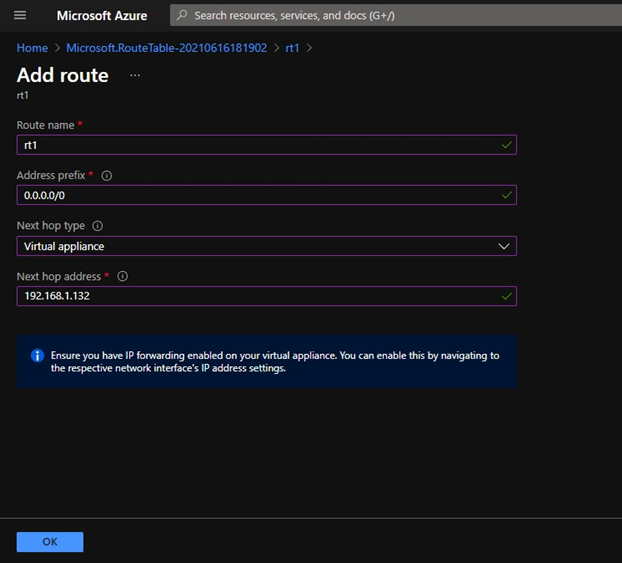
Adding the Route.
Verifying the IP Address
The Topology Diagram after Firewall
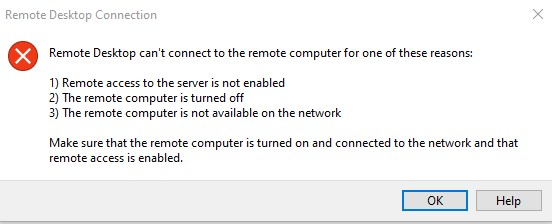
BY DEFAULT, ALL THE TRAFFIC IS DENIED
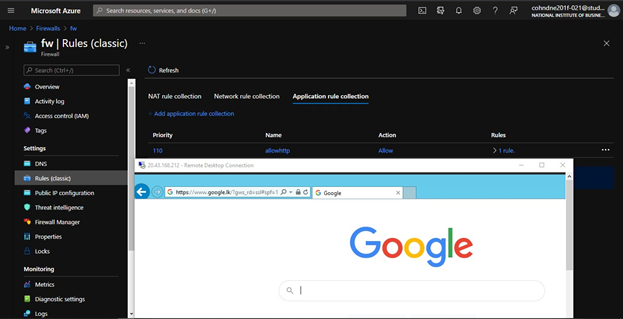
Adding NAT Rule for RDP connection
Adding Layer 7 Rule
Now we can verify the Configuration