Introduction
Microsoft Azure’s Azure AD Cloud Sync is a powerful solution that enables organizations to synchronize their on-premises Active Directory with Azure AD. This seamless data synchronization bridges the gap between local infrastructure and the cloud, simplifying identity and access management. In this blog post, we will explore the deployment process of Azure AD Cloud Sync, step-by-step, to help you leverage this solution for efficient data synchronization and streamlined operations.
Why not Microsoft Identity Manager?
Significant infrastructure investment and specialized expertise are typically required for deploying and managing Microsoft Identity Manager (MIM). This is one of the reasons why it is not the most recommended tool for syncing Active Directory (AD) with Azure AD.
Why not Azure AD Connect Sync?
This solution requires a significant infrastructure investment and incurs high maintenance costs. Additionally, it is the original provisioning solution specifically designed for Azure AD.
Azure AD Cloud Sync
The Next Generation Sync Solution is quick to deploy and features a high availability architecture, requiring minimal infrastructure investment. It is a cost-effective option with a straightforward configuration process.
Azure AD Connect cloud sync simplifies the process of provisioning from on-premises Active Directory (AD) to Azure AD. Organizations only need to deploy a lightweight agent in their local or IaaS-hosted environment. This agent acts as a bridge between Azure AD and AD, facilitating the synchronization. The provisioning configuration is stored in Azure AD and managed as part of the service.
Comparison between Azure AD Connect and cloud sync
Scenarios supported by Cloud Sync
- Single forest, single Azure AD tenant
- Multi-forest, single Azure AD tenant
- Existing forest with Azure AD Connect, new forest with cloud provisioning
- Piloting Azure AD Connect cloud sync in an existing hybrid AD forest
Provisioning agent?
The synchronization tool known as the provisioning agent is responsible for delivering various features that can be utilized with Azure AD. It is managed from the cloud.
Meanwhile, One of the main functions of the provisioning agent is to establish connectivity between Azure Active Directory (Azure AD) and your on-premises environment.
Some of the features provided by the provisioning agent include:
- Cloud sync
- On-premises app provisioning
Configuring Azure AD Cloud Sync Agent
- Sign into Azure Portal and Search for Azure Active Directory

- Scroll Down and Click on Azure AD Connect

- You will be navigated to AAD Connect Page and Click on Cloud Sync

Note: Make sure to create cloud-only account and then assign with Hybrid Identity Administrator role.
- In the AAD Connect Page Click on Agent and Download the On Prem Agent

- Read the Terms and Click Accept & Download
- In this we are doing is installing the Agent, then set up configuration within Azure AD to tie them with the Agent.

- In your Windows Server, Double click on the Agent and click Run
Note: the server must be running a version of .NET that is 4.7.1 or higher. Microsoft .NET Framework 4.7.2 offline installer for Windows
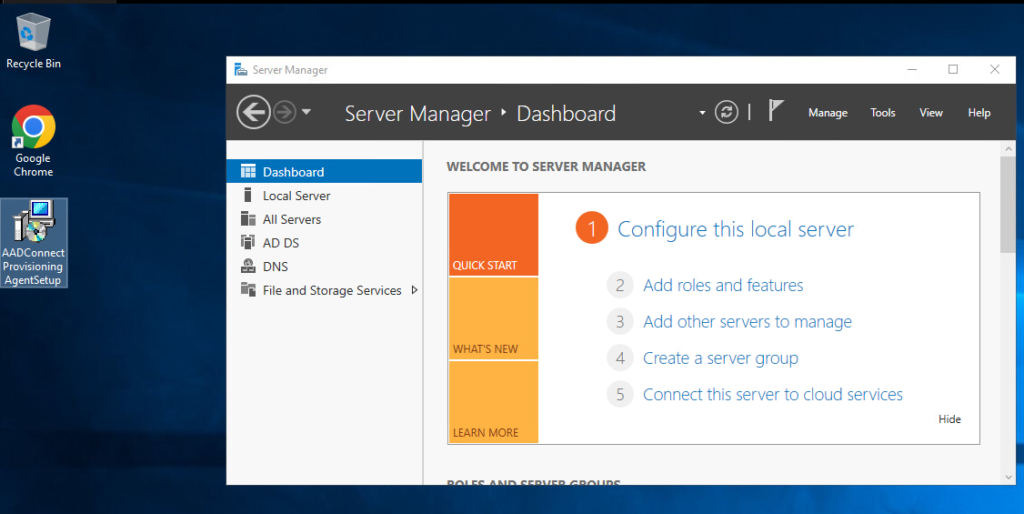
- In the gent Package Read the License Terms and Condition, Tick it and Click Install

- After Installation Completed, run the AADConnectProvisioningAgentSetup.exe installation file from your downloads folder.
- The configuration wizard will launch and click Next.
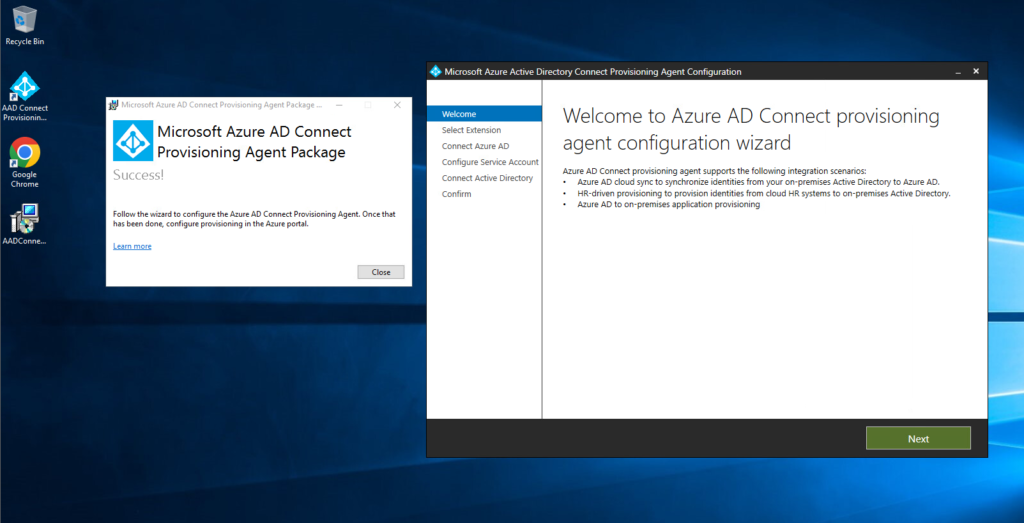
- On the Select Extension screen, select HR-driven provisioning (Workday and SuccessFactors) / Azure AD Connect Cloud Sync for this Blog and click Next.

- Sign in with your Azure AD Hybrid Identity Administrator Account or Global Administrator account.

In the Configure Service Account screen, you have the option to select a group Managed Service Account (gMSA) that will be used to run the agent service. If you already have a managed service account configured in your domain, you can skip this screen. However, if needed, you can choose one of the following options:
- Create gMSA: This option allows the agent to create a managed service account named provAgentgMSA$ for you. The group managed service account, such as JD\provAgentgMSA$, will be created in the Active Directory domain where the host server is joined. To proceed with this option, you need to provide the credentials of an Active Directory domain administrator.
- Use custom gMSA: If you have a specific managed service account already created, you can choose this option and enter the name of the desired managed service account.

- On the Connect Active Directory screen, if your domain name appears under Configured domains, skip to the next step. Otherwise, type your Active Directory domain name, and select Add directory.

- Select Next to continue.
- After completing the configuration settings, go to the Configuration complete screen and choose the “Confirm” option. This action will register the agent and initiate a restart.

- Therefore once the registration and restart process (Can take up to 2 Minutes) is finished, you will receive a notification stating “Your agent configuration was successfully verified.” At this point, you can select the “Exit” option to finalize the configuration process.

Verifying the Agent
Let’s verify the Agent in Azure Portal as well as our On-Premise Server.
AZURE PORTAL
- In the Cloud Sync Dashboard Click Agents, you can see the agent installed.

On-Premise
- In the Server search for Run and Type services.msc
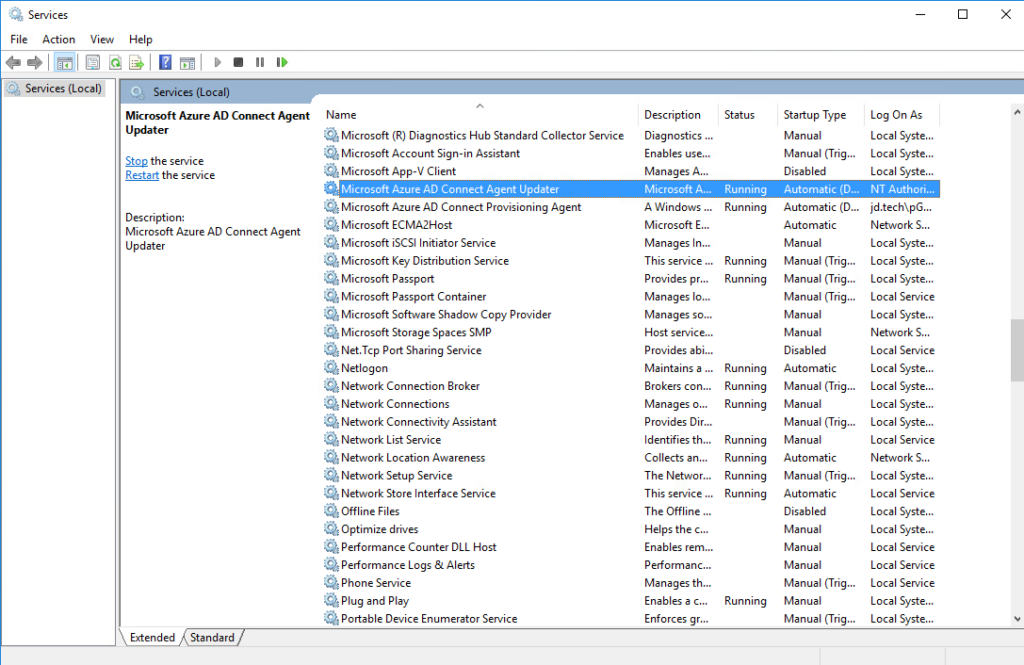
The Cloud Sync Process
- In the Configuration Tab, Click New New Configuration
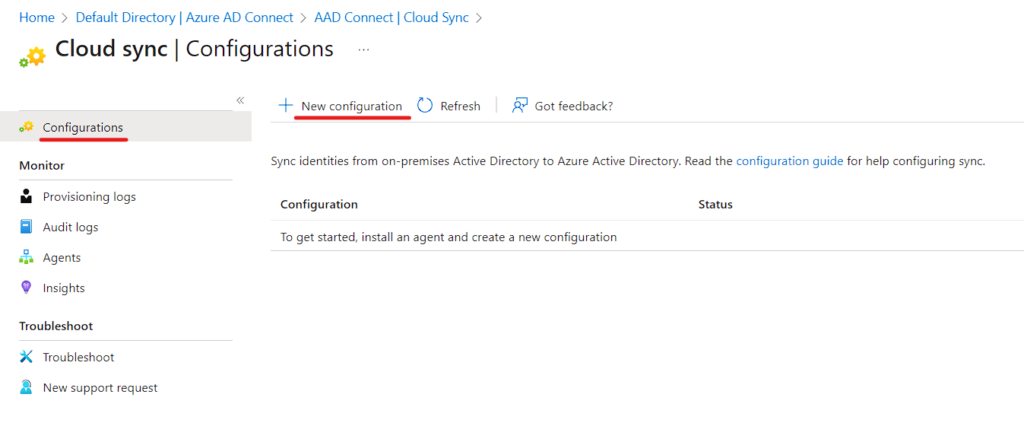
- Select which domain you want to sync and you can Enable Password Hash Sync.
- After you click Create it will navigate to Configuration Detail Dashboard
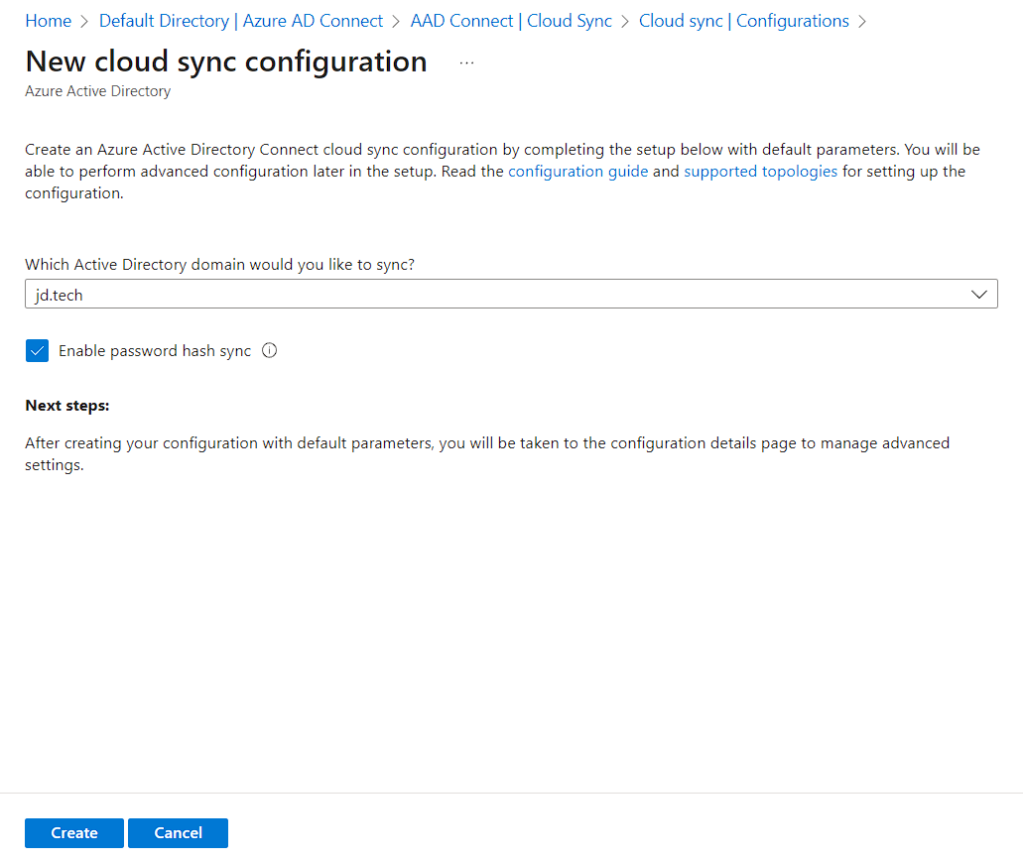
Note: Part 1 Image
- You can see the Configuration List to be done
- Add Scoping Filters – We can specify the User Groups to be Sync
- Edit Mapping – This is where Attribute Mappings happens.
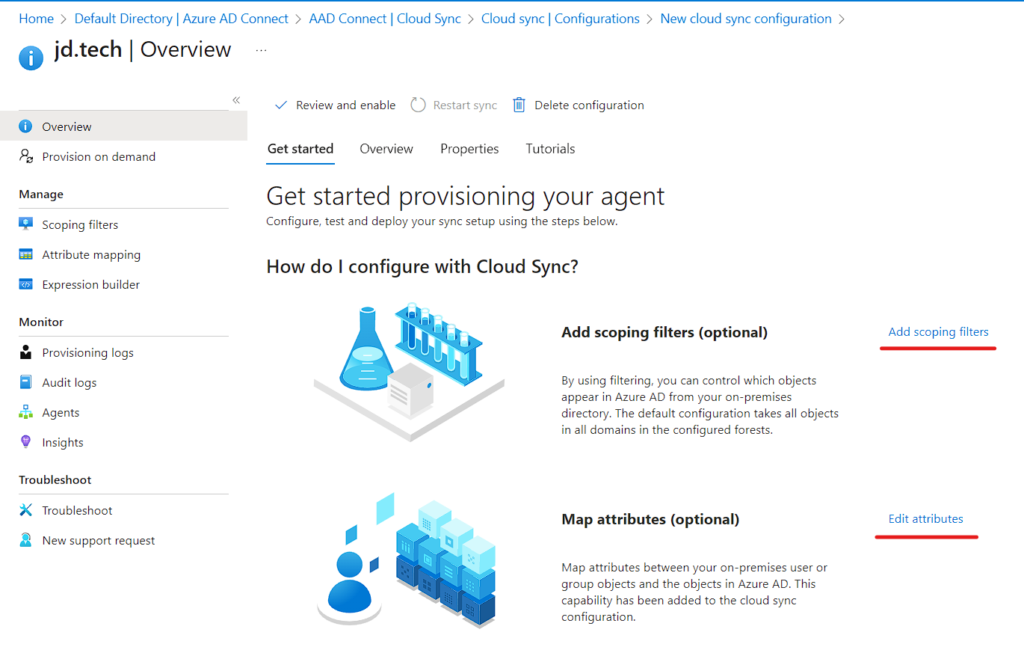
- Scoping Filters – In this Blog I’m only Sync Training OU

- Attribute Mapping – In this Blog I’m keeping it Default
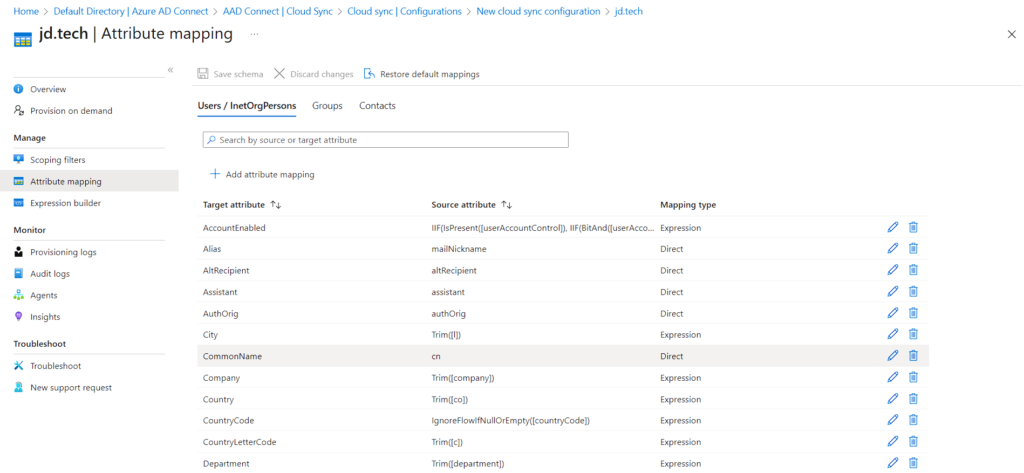
In Addition: Part 1 Image Cont….
You can see the Configuration List to be done
- Test – We can provision User and test our connection
- View default properties – To see our Settings.
- Enable your configuration – After all the Configuration done you have to enable it so it gets applied.
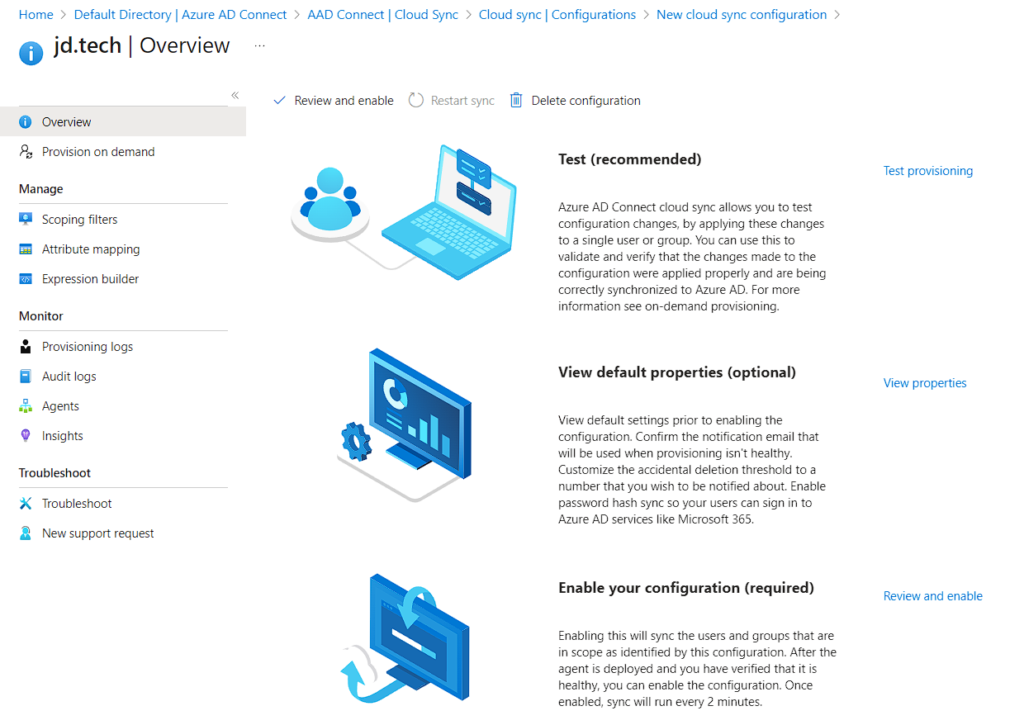
- Test – Validating
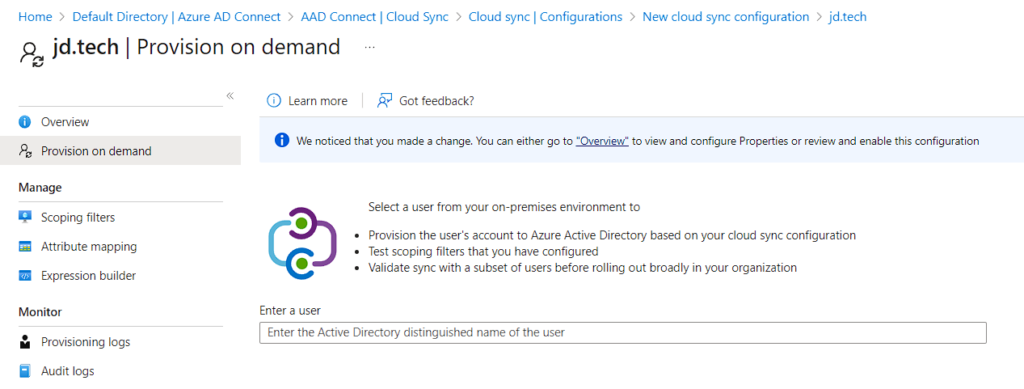
- View – Default Settings

- Alongside Enable your configuration click the Review and Enable.
- Sidebar will show an Overview then Click on Enable Configuration.
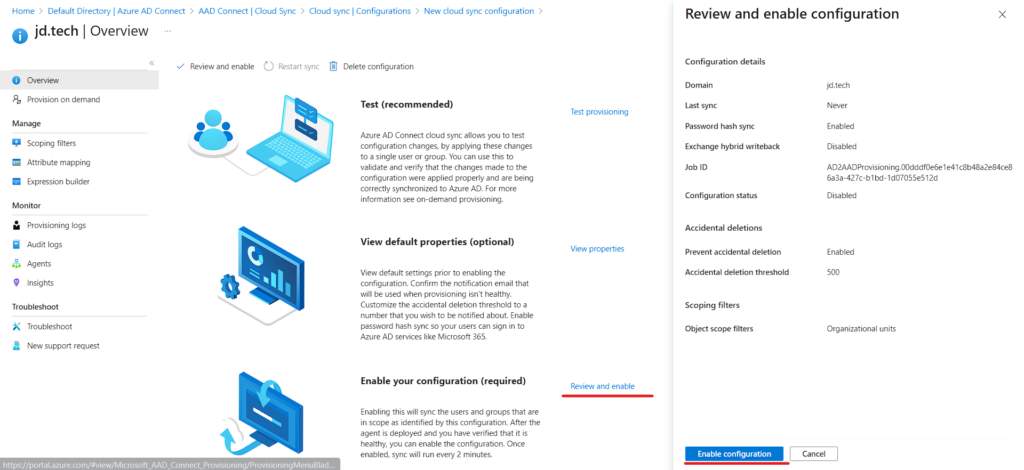
- Configuration Done
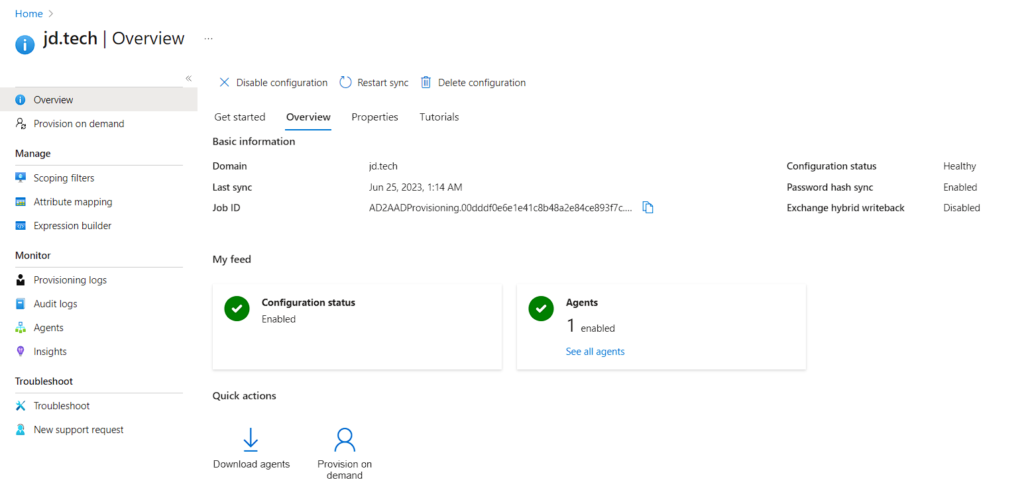
Summary
In conclusion, Microsoft Azure’s Azure AD Cloud Sync offers a powerful solution for synchronizing on-premises Active Directory with Azure AD. It simplifies identity and access management by seamlessly bridging the gap between local infrastructure and the cloud. Unlike Microsoft Identity Manager (MIM), Azure AD Cloud Sync requires minimal infrastructure investment and is a cost-effective option. It provides a straightforward configuration process and enables organizations to synchronize data efficiently. By deploying a lightweight agent as a bridge between Azure AD and AD, organizations can easily manage the provisioning process. Overall, Azure AD Cloud Sync is a user-friendly and efficient solution for achieving seamless synchronization between on-premises Active Directory and Azure AD.

